Balancing sample/target tool (?):
- Make a copy of the reference photo (the one where the Digi Grey is visible) and work on the copy. To make a copy, open the reference photo and save it under another name in the .bmp or .tif format (-> File - > Save as). To work on the copy is compulsory because if you modify your reference photo you cannot make any more correction with the Digi Grey.
- Open the copy of the reference photo.
- Select the Balancing sample/target tool :
-> Image
-> Adjust
-> Balancing sample/target:
- The tool displays as following:
- Click on Reset if the "Example" and "Target" boxes are not empty:
- Click on the grey dropper icon:
- Click on the grey of the Digi Grey:
If the cursor takes the form of a hand insteed of a dropper, click one more time on the dropper icon.
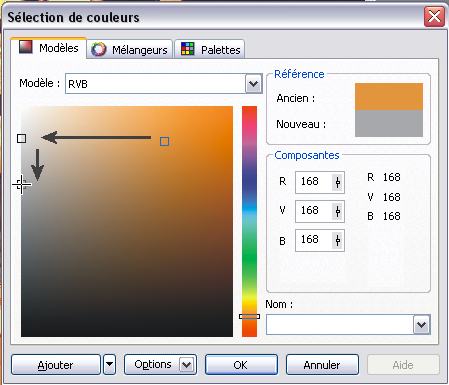
- Click on the colored area under "Target". You will define the grey target:
- The color selected with the dropper will be shown in a little square. Click on the square and drag it horizontally to the left border in the grey area. You will see under "Reference" that the "New" area seems visually lighter than the "Old" area. Drag the cursor down until you see a grey which luminosity approaches the luminosity of the "Old" color. Click on OK:
- Click on the black dropper icon:

- Click on the black area of the Digi Grey:
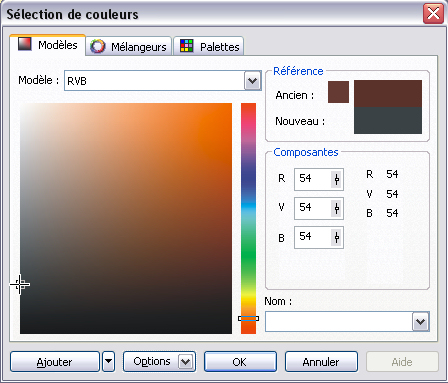
- Click on the colored area under "Target". You will define the black colour target:
- Select a black color which luminosity approaches the luminosity of of the "Old" colored area. The black area of the Digi Grey is not a pure black. We suggest you select a value between 10 and 60:
- Click on the white dropper:
- Click with the dropper on the white area of the Digi Grey:
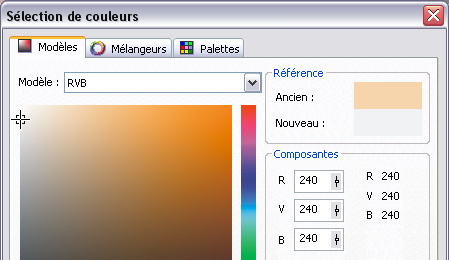
- To define the white target, click on the colored area under "Target":
- The white area of the Digi Grey is not a pure white. We suggest you select a value between 230 and 250:
- The result is a little too "cyan" (blue/green) as you can see in the grey of the Digi Grey:
- It is possible to improve the correction in resetting the tool and sample one more time the grey of the Digi Grey:
- Close the reference photo.
- It is now easy to correct the other photos taken under the same lighting. Open them and click on the "Balancing sample/target" tool. The correction obtained with the reference photo is still in memory. Click on OK to apply it without to use the dropper.
- Do it for each photo.
- Photo-Paint is able to automatically correct a group of photos without to do it manually (-> File -> Batch process).
Remark :
You may also use in Photo-Paint the free plugin PowerRetouchet. |